Just leave me a comment by Sunday night and I will randomly pick a winner Monday morning.


Just leave me a comment by Sunday night and I will randomly pick a winner Monday morning.

Yep, I figured out how to make a button for nanny goat.
(just copy and paste the code below onto your sidebar... and let me know if it actually works ;0)


Thanks for the comments and emails. I think a banner tutorial is a great idea!
I'll get started on it ASAP.
And I'm thinking about my first giveaway...


 I can't help it.
 Hope you have a "HAPPY DAY"!


all you need to make these are:
Plain white canvases from your local art supply store
Scrapbook paper (that is what I used, you could probably use fabric also)
Mod Podge- to glue the paper on and then applied over the whole thing
Buttons
Hot Glue- to attach the buttons
Ribbon
Stapler- to attach the ribbon to the canvas
There you have it, your very own wall art and everyone will think you are an artist!


 I wanted to do something fun for my hubby this year for Valentines so I printed 25 of the above card and handed them out to our family to fill in what they love about him. I'm going to hide all of the notes in his car for him to find... ssshhhhh...don't tell.
 I thought it would be fun this year to make our own valentine cards with photoshop elements.

I tried it today on a spot of paint on my carpet from when I painted my little boy's room several months ago.
Guess what... it worked... I'm serious.


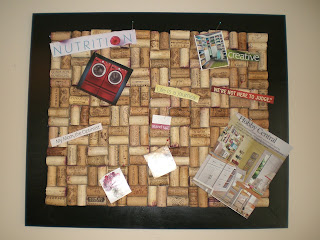
#2- We cut out a piece of solid cardboard to fit in the back of the open frame and proceeded to hot glue the corks onto the cardboard in our desired patterns. (My mom donated some wine corks she found at a yard sale and the rest we purchased on eBay.) Notice in the picture below that the frame is not painted... we used it as a guide while the others were drying but do not glue all your corks down until the frame is painted and ready to go because you will not be able to get the cardboard with the corks attached in or out after they are all glued on.

#3- Hang and enjoy with either photos or as a vision board.


